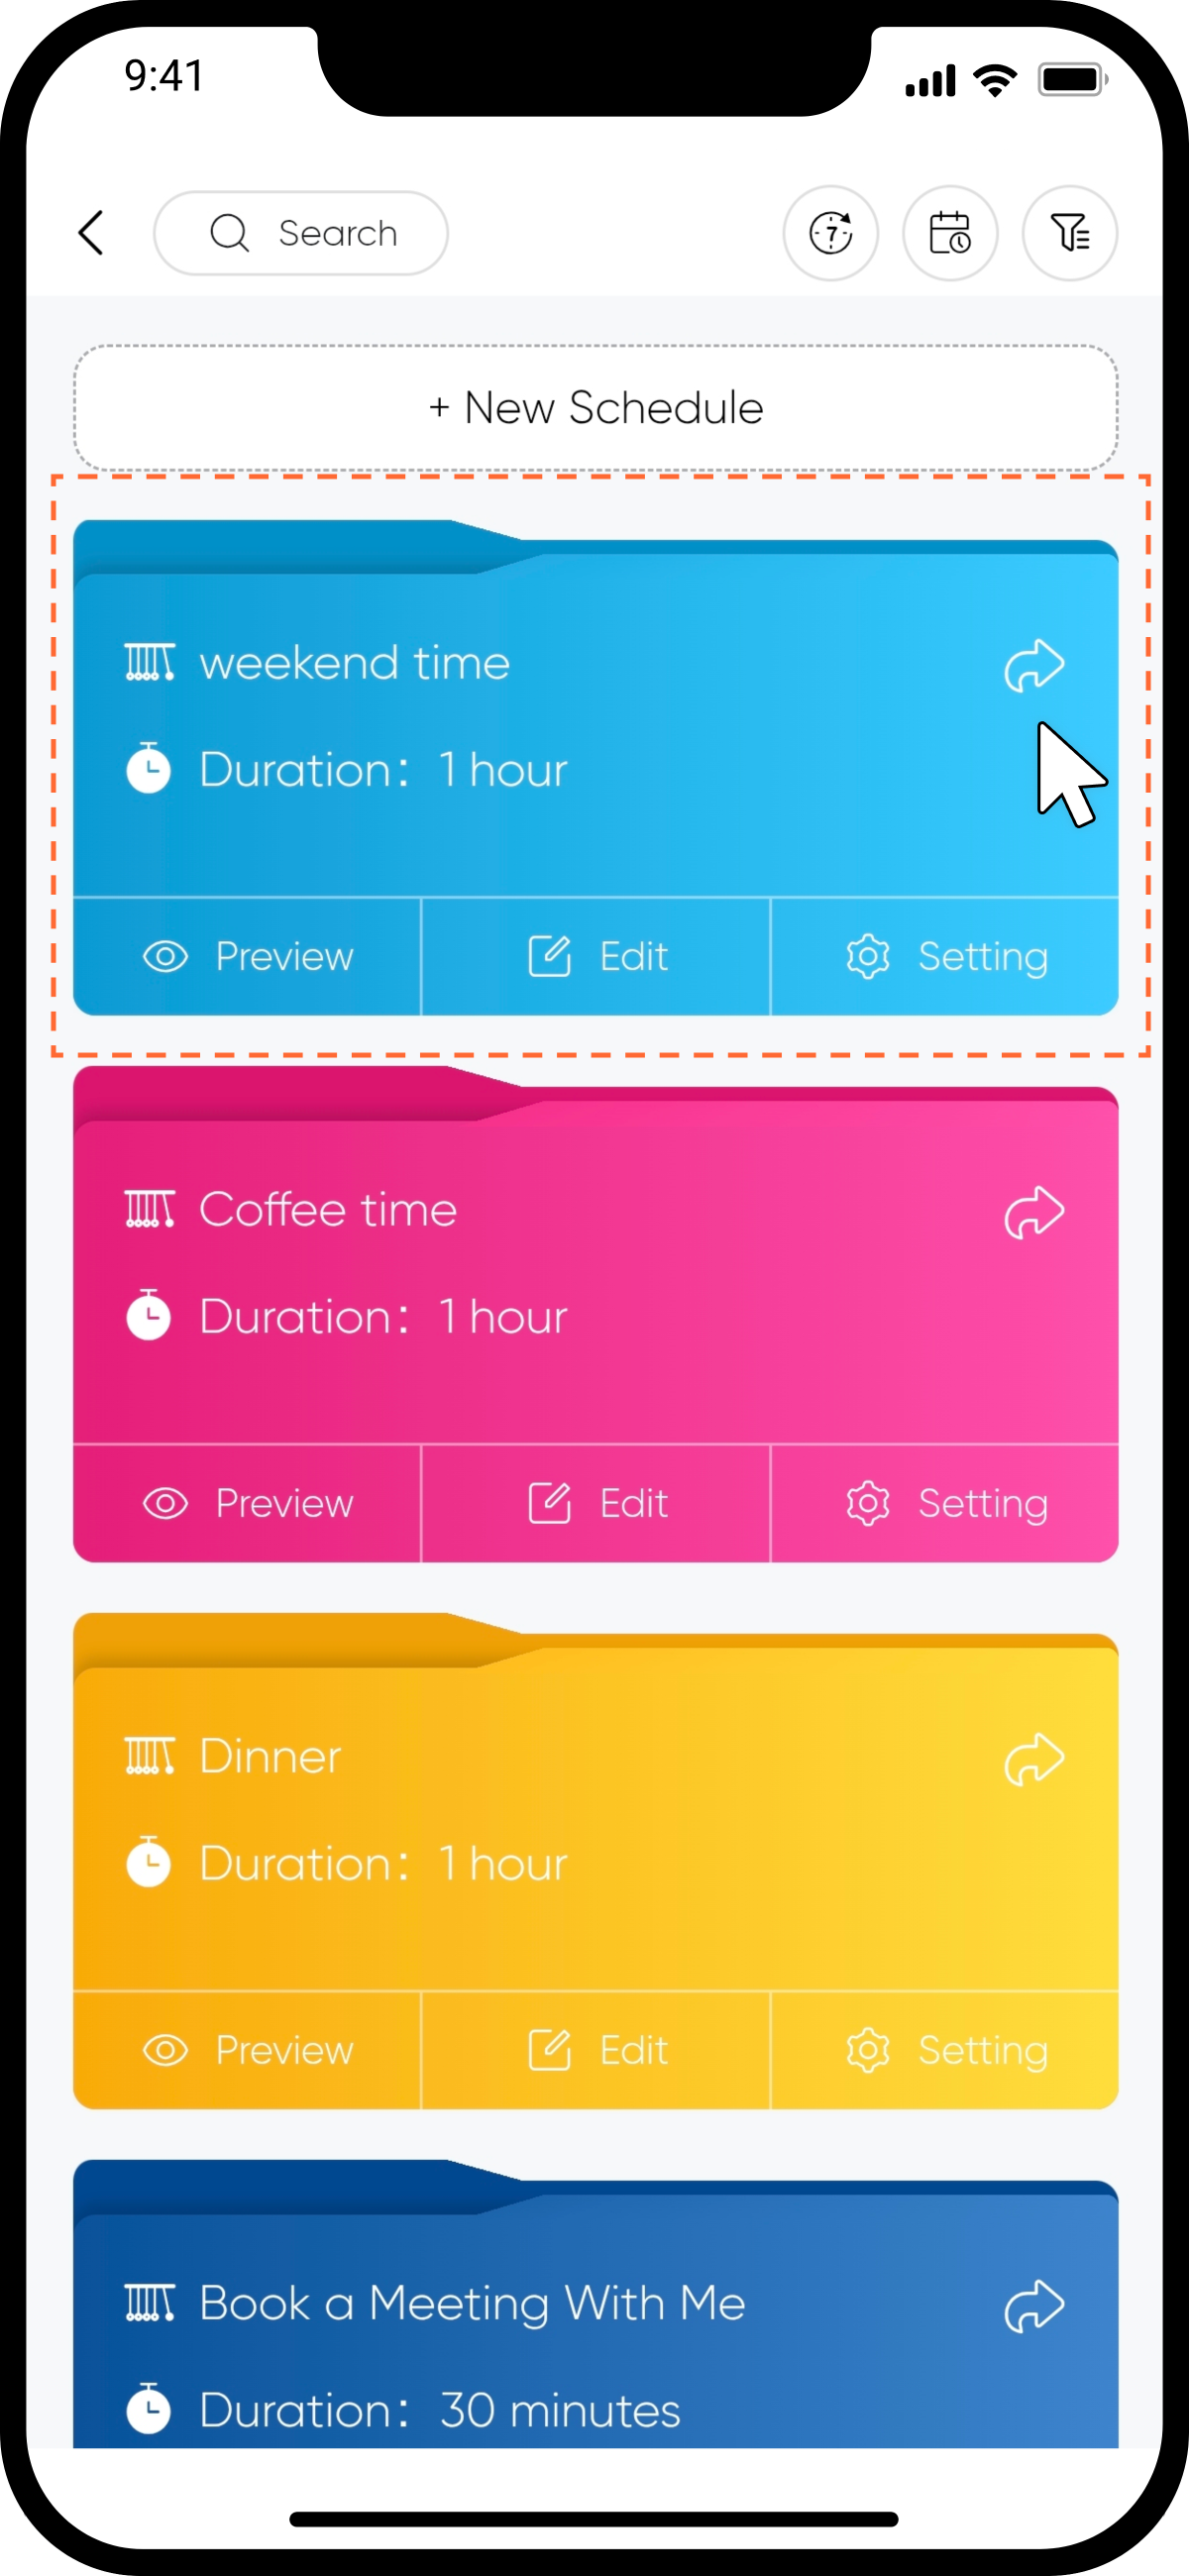
web/phone
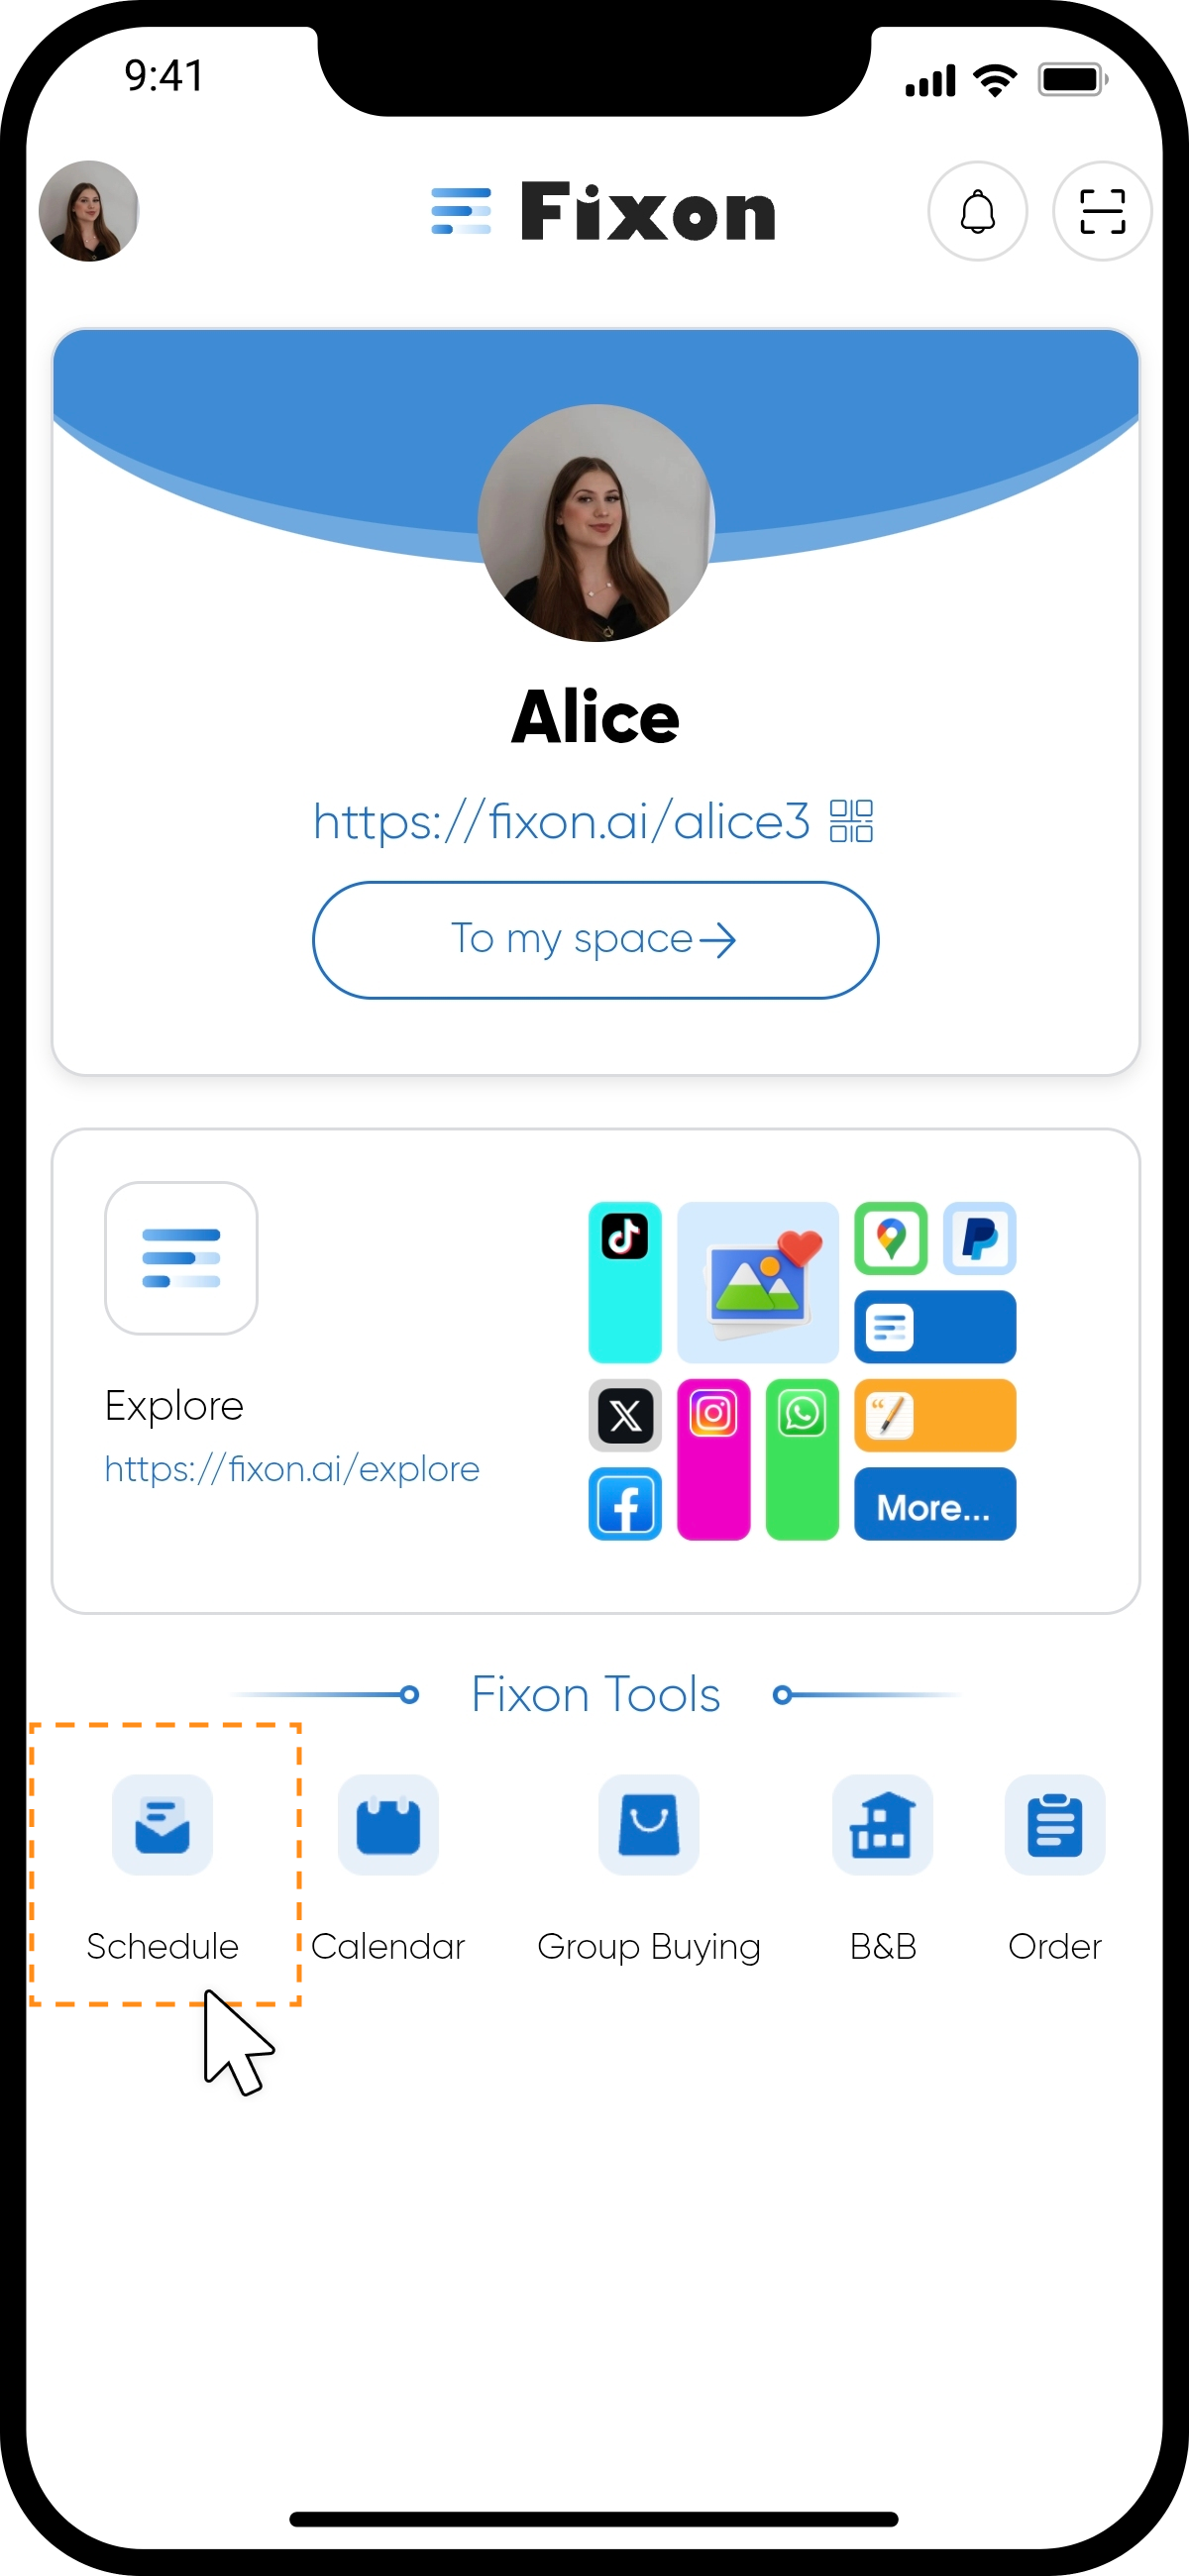
step1
Start by clicking the "Schedule" icon on the panel.
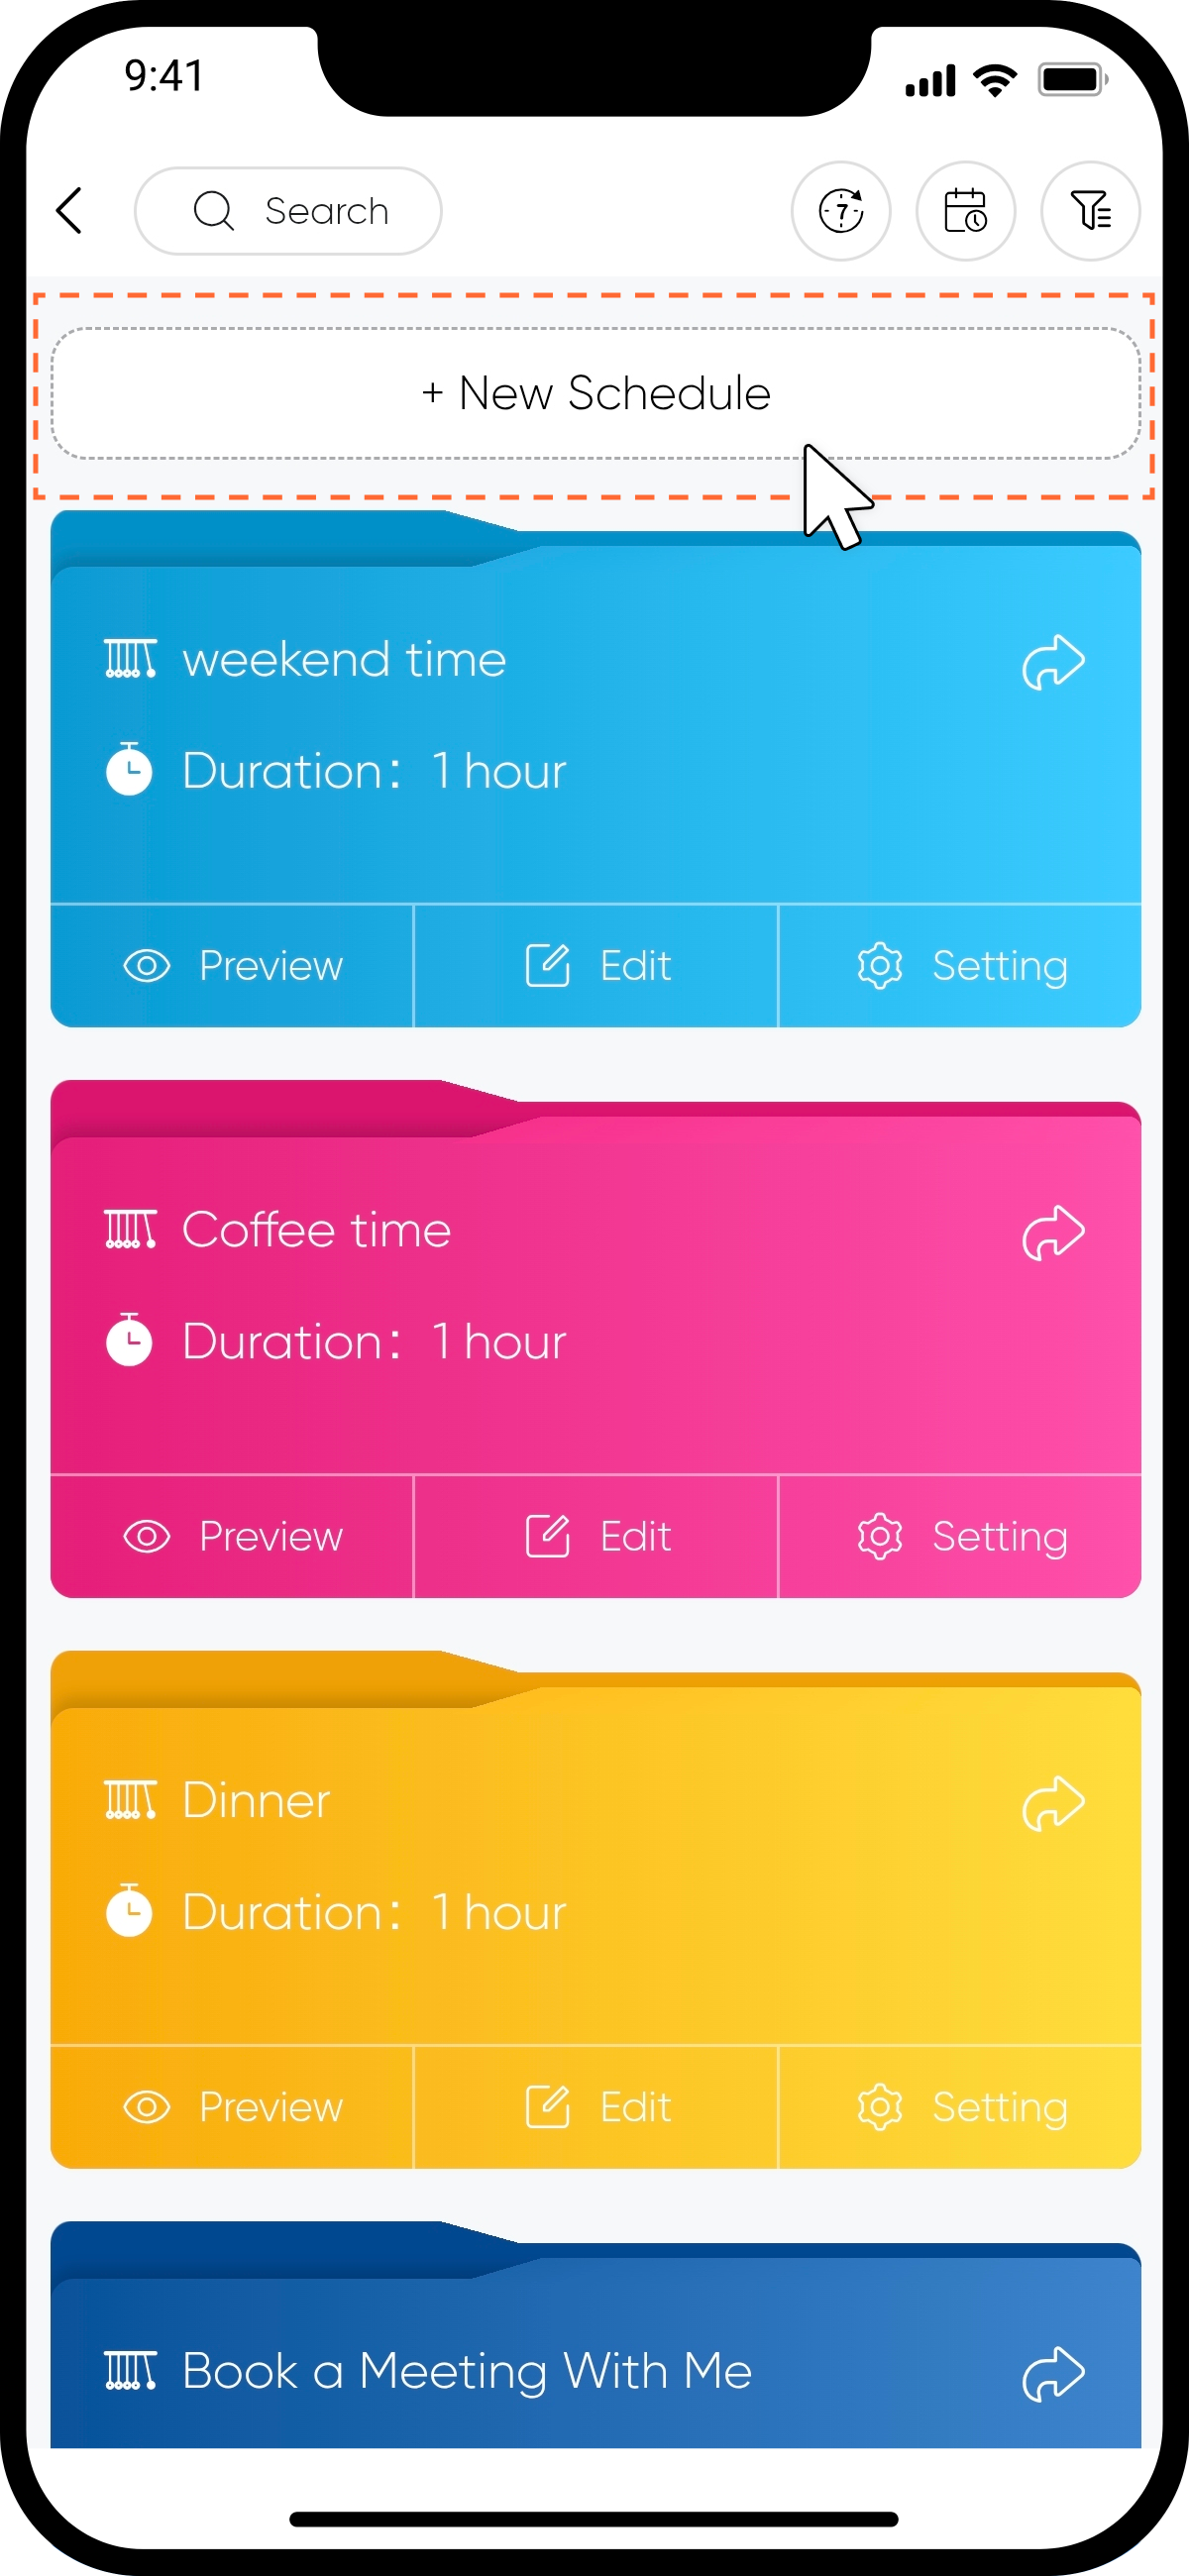
step2
Click "+New Schedule" at the top of the page. Select the type of event you want to create.
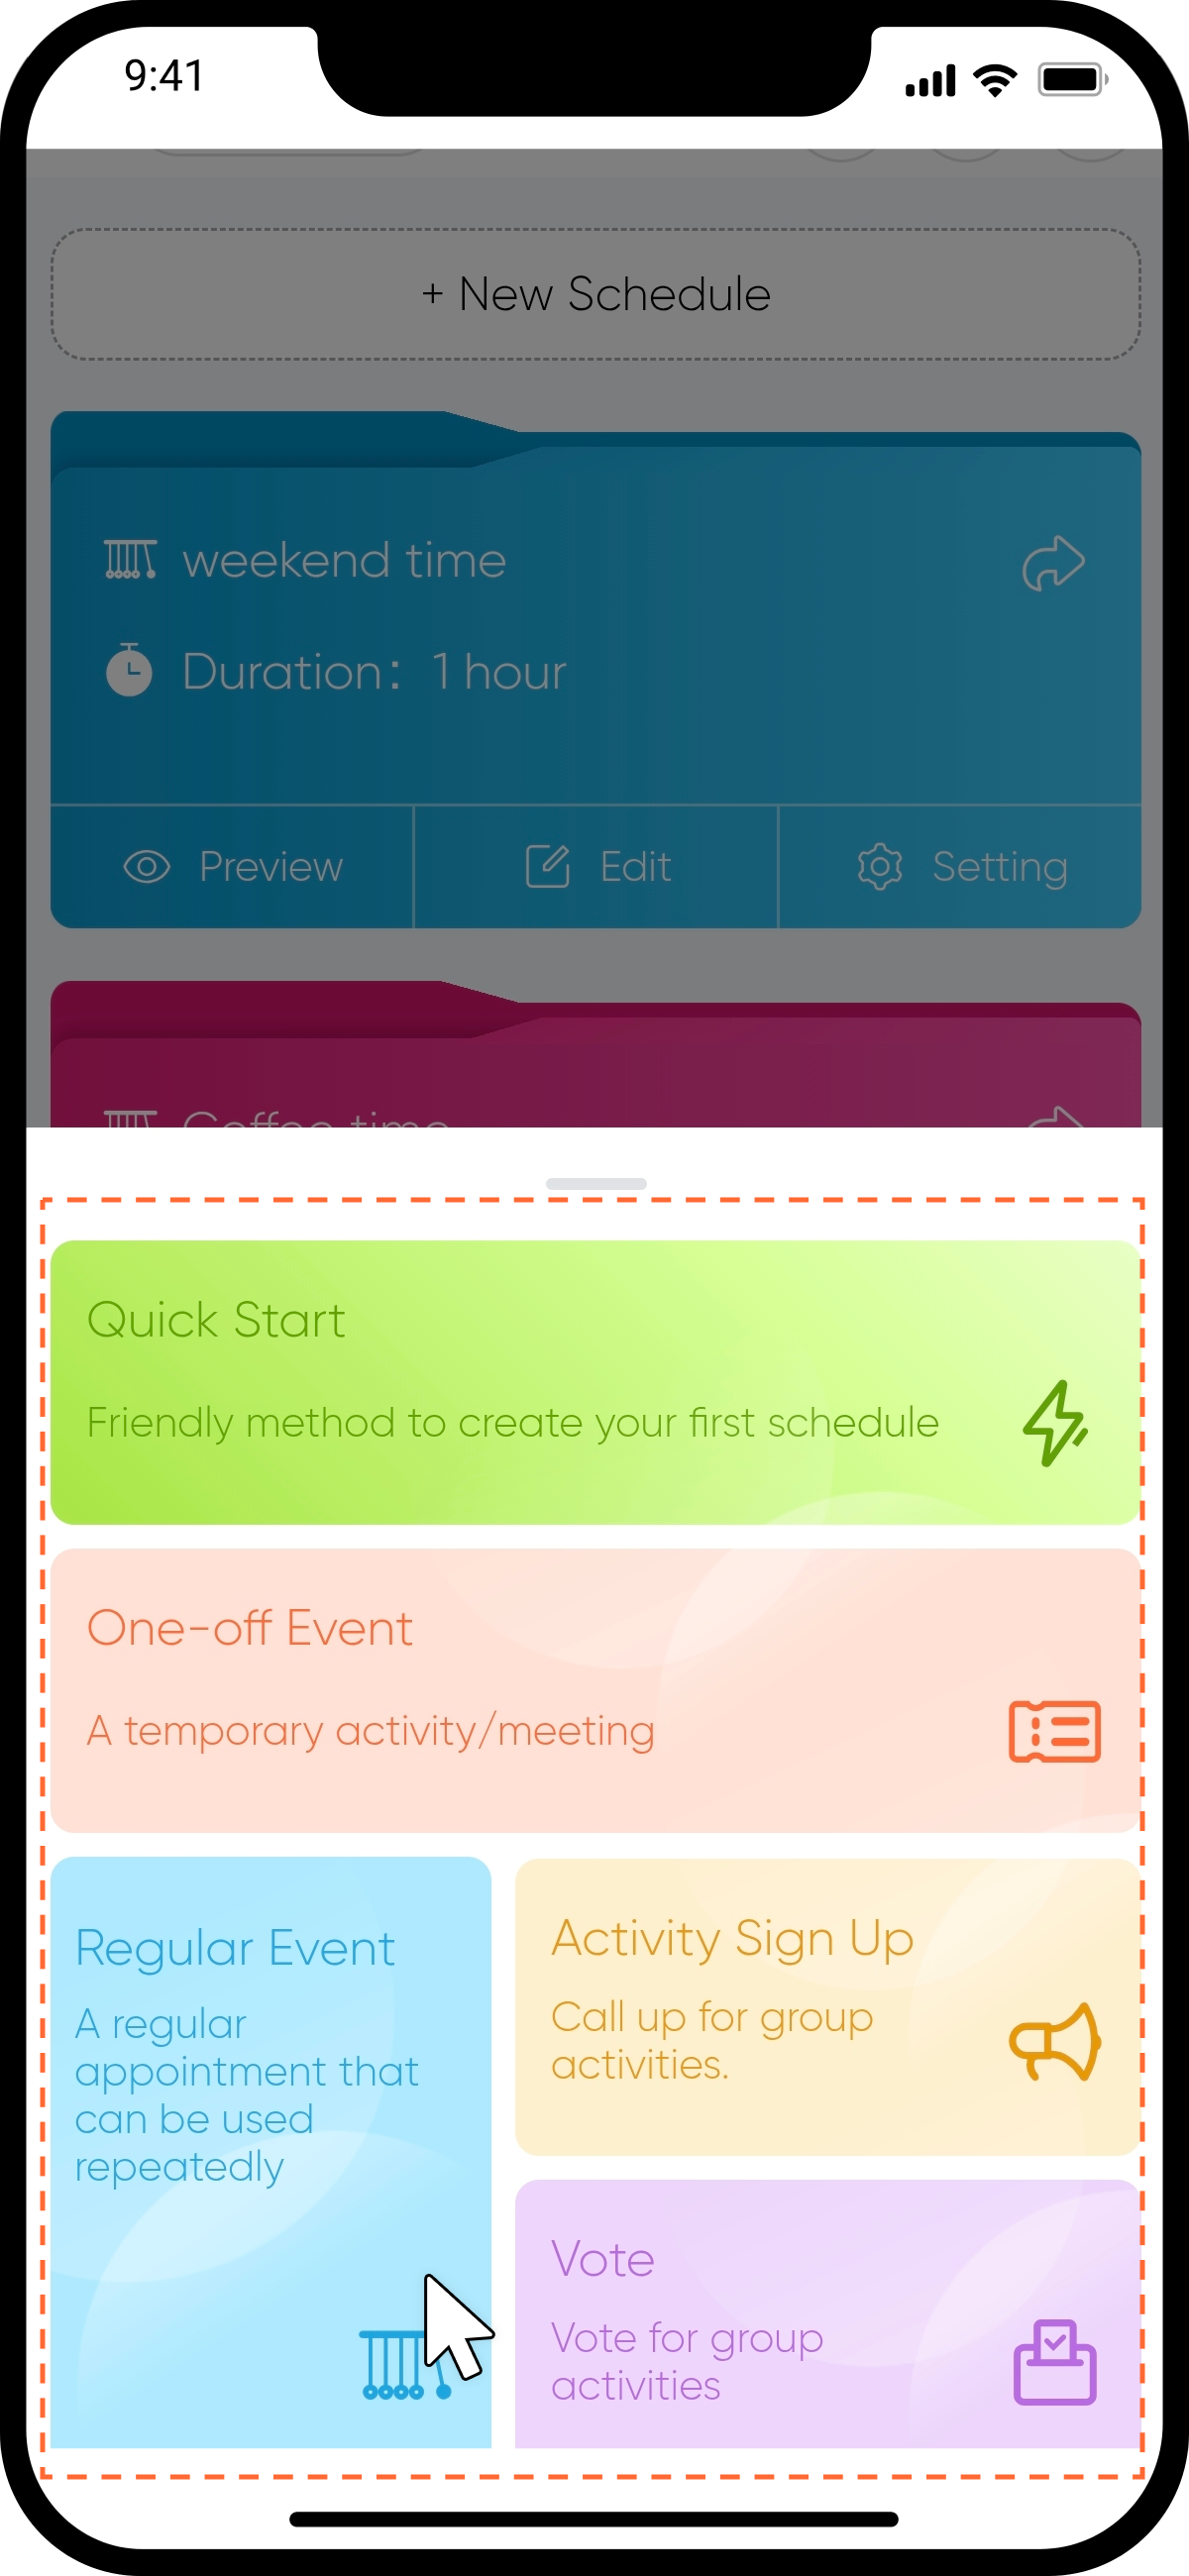
step3 Choose from 4 schedule types.
Fixon offers 4 types of shedule (Quick Start is a subtype of Regular Event). Select the one that fits your needs. For this tutorial, we’ll use "Regular Event" as an example.
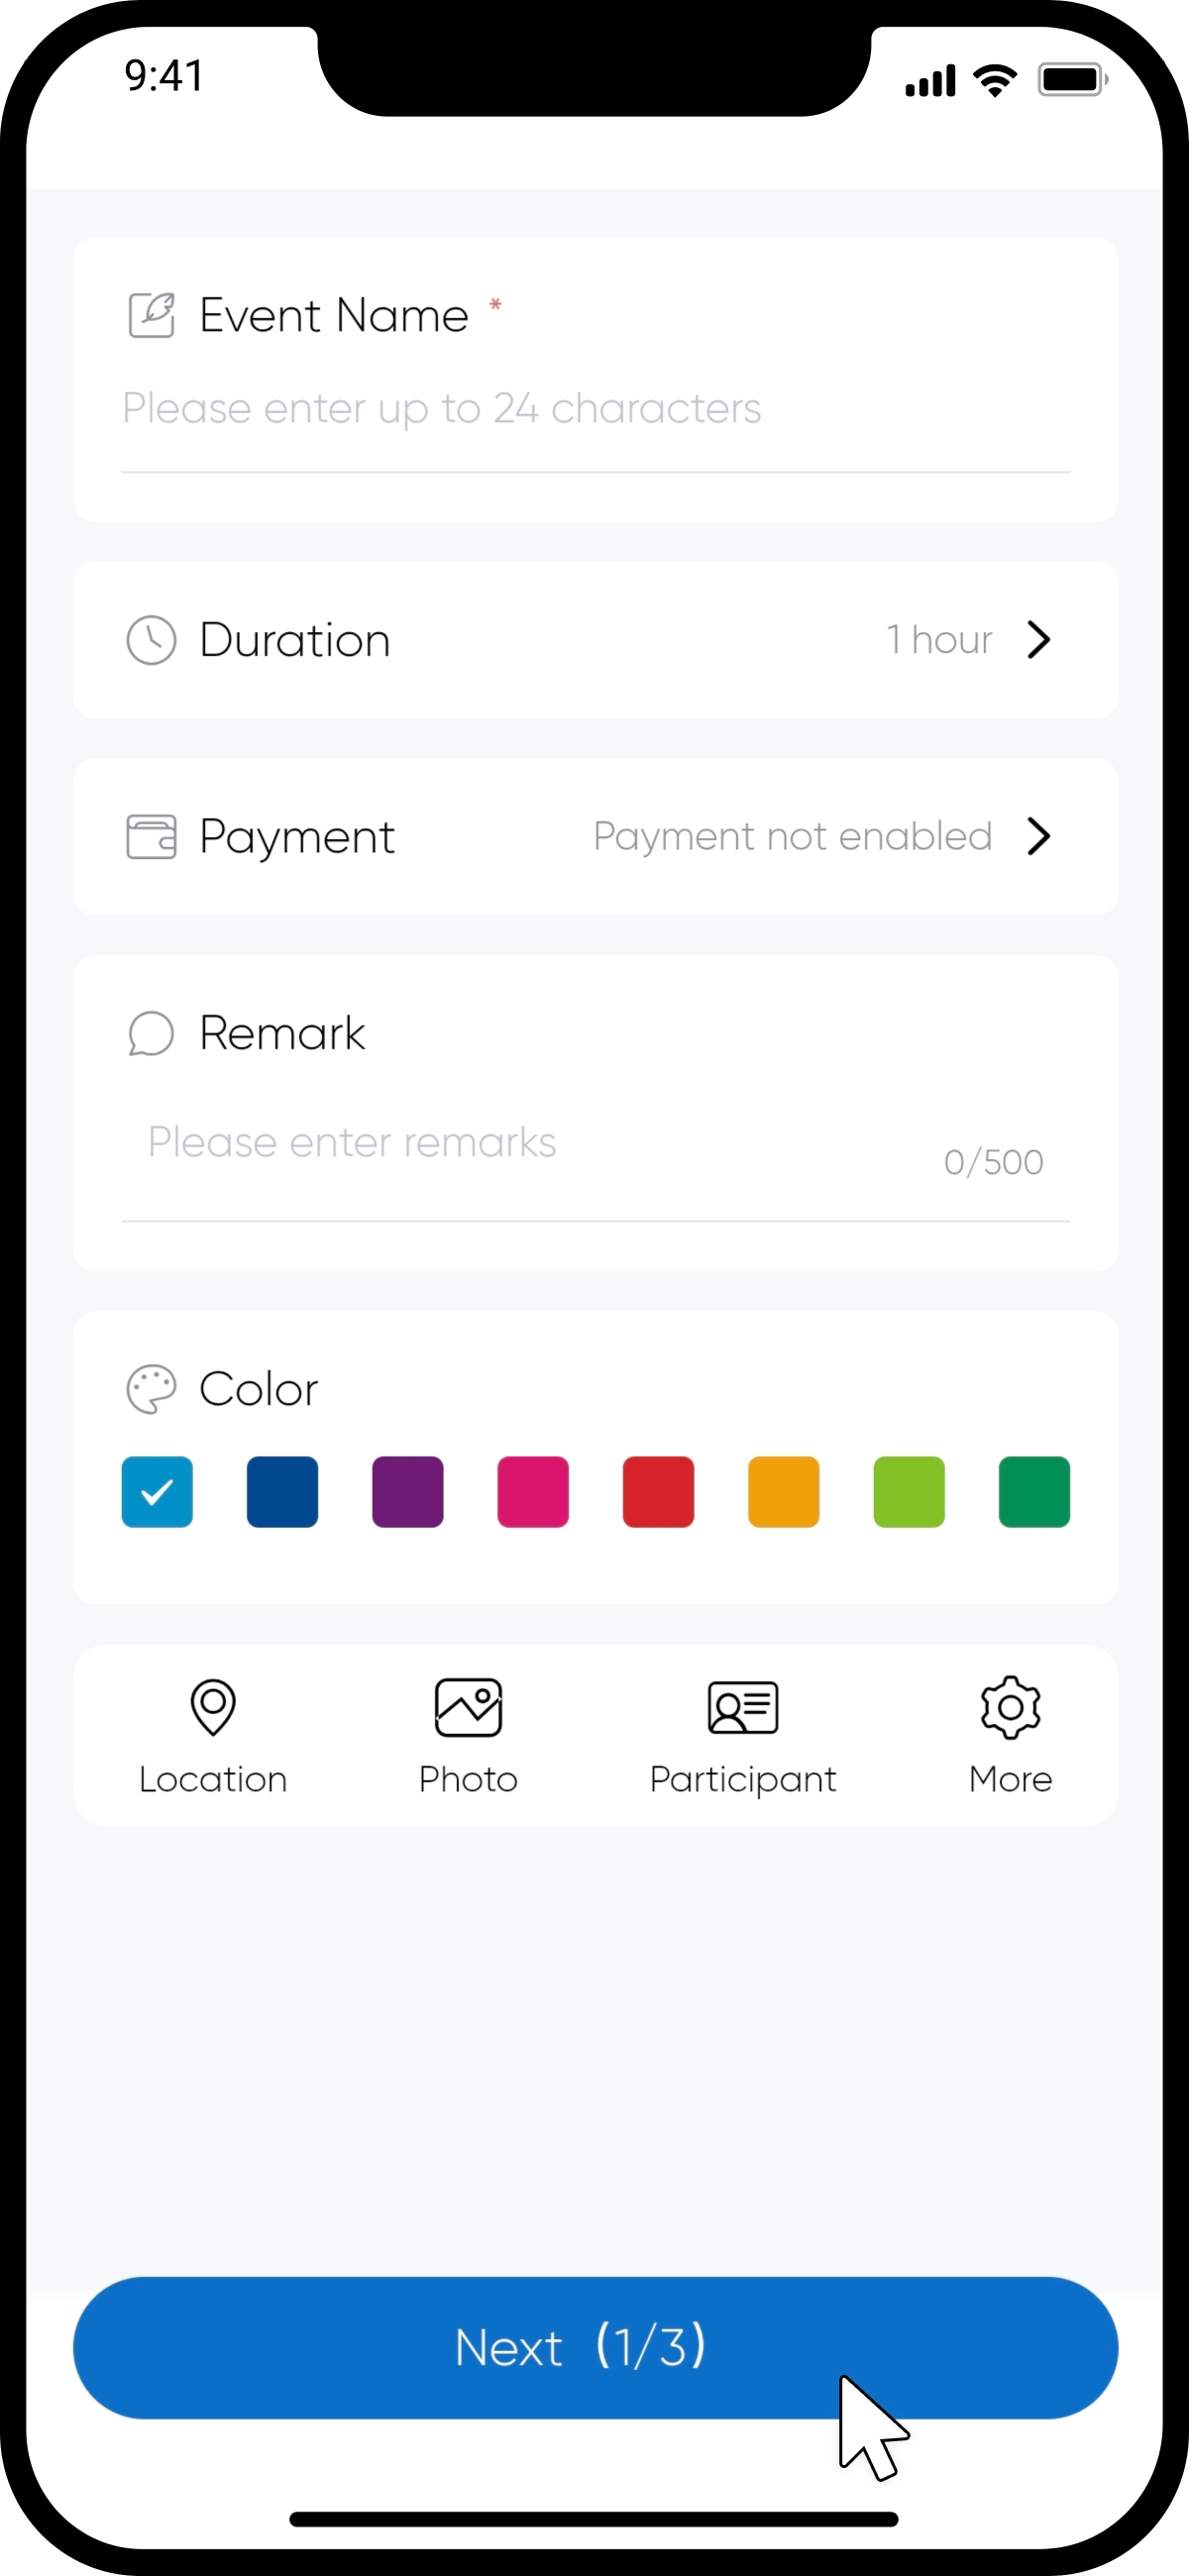
step4 Fill in basic details
Enter the Event Name, Duration, Payment, Location, and other essential information.
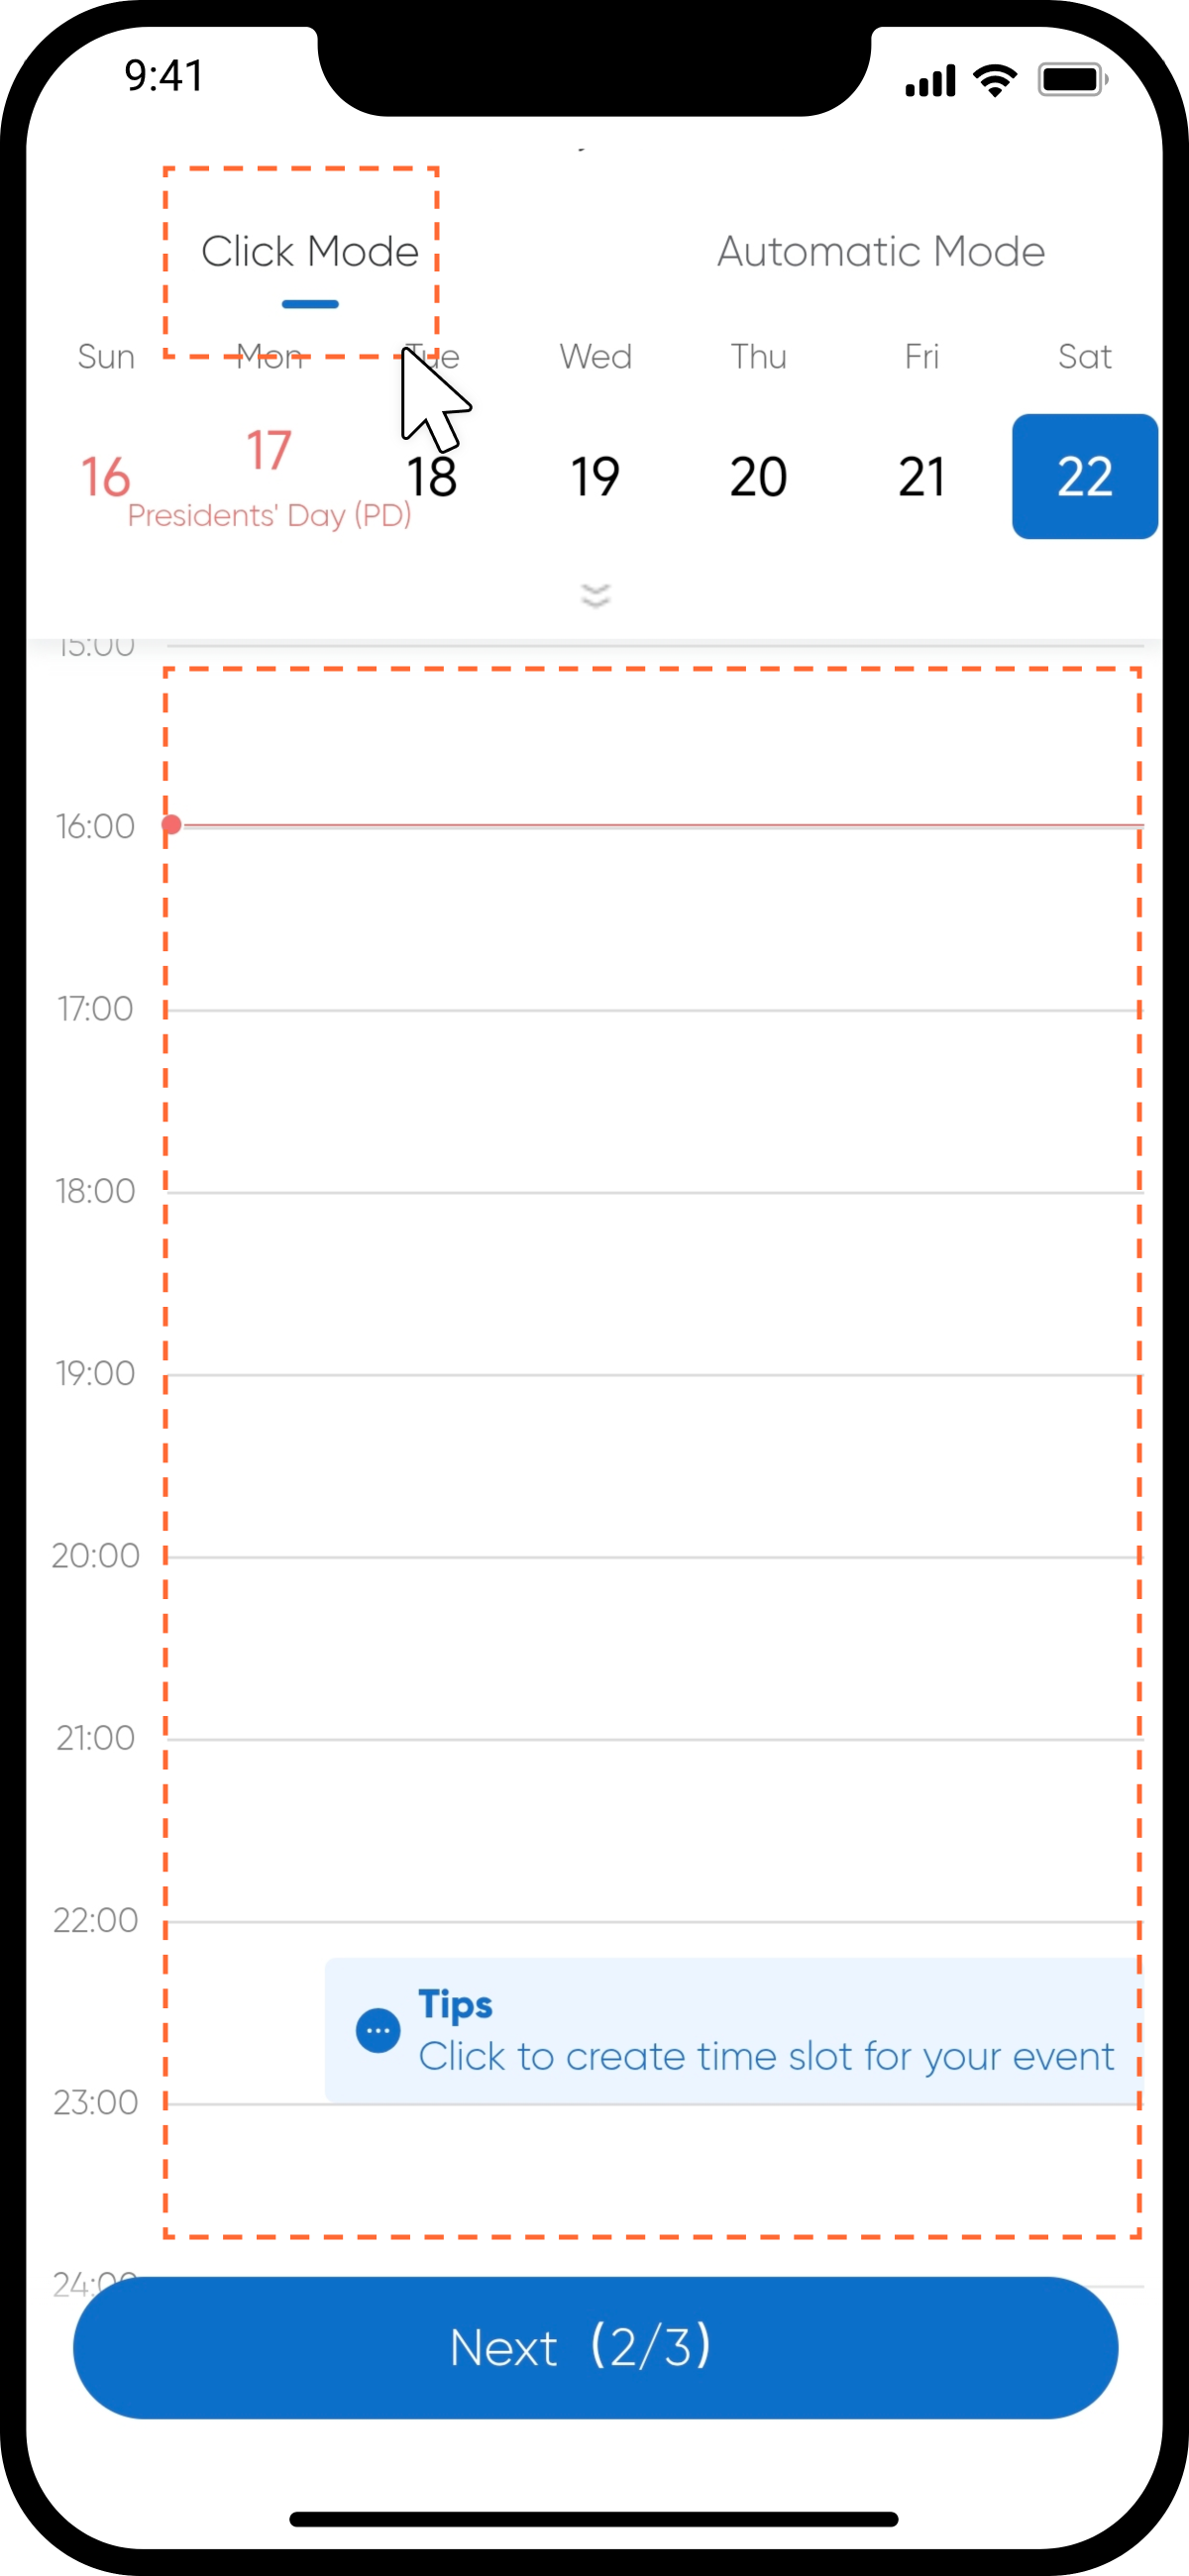
step5 Set time slots - Click Mode
In Click Mode, you can manually select any future time slots for participants to choose from. You can offer one or multiple time slots.
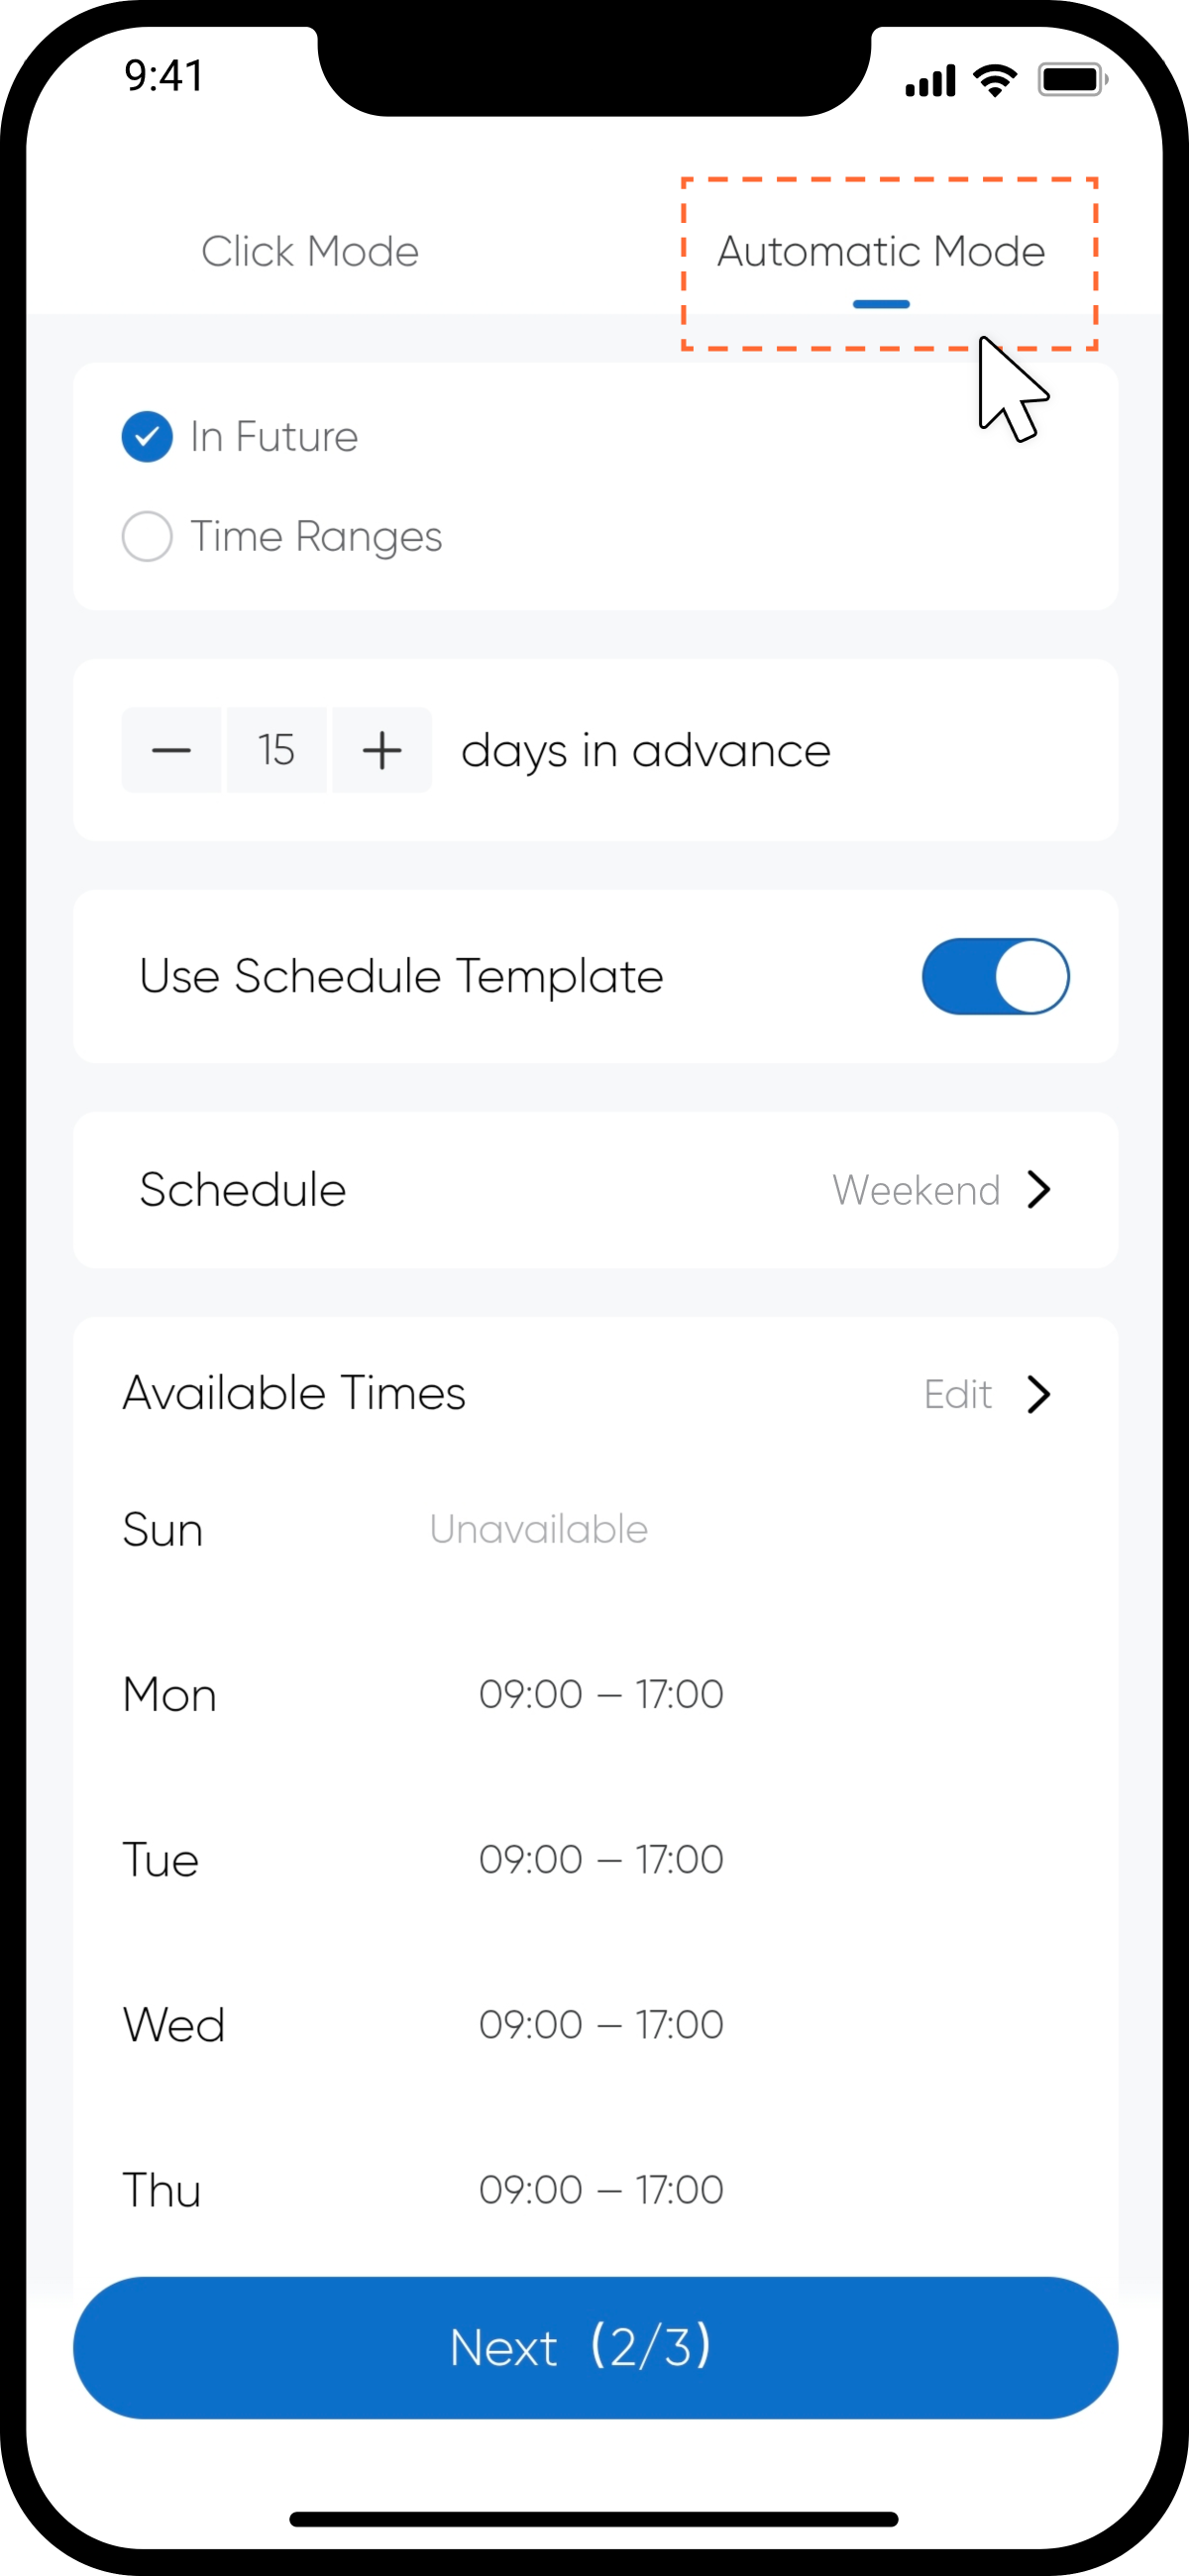
step6 Set time slots - Automatic Mode
In Automatic Mode, Fixon will automatically suggest available time slots based on your existing schedule template.
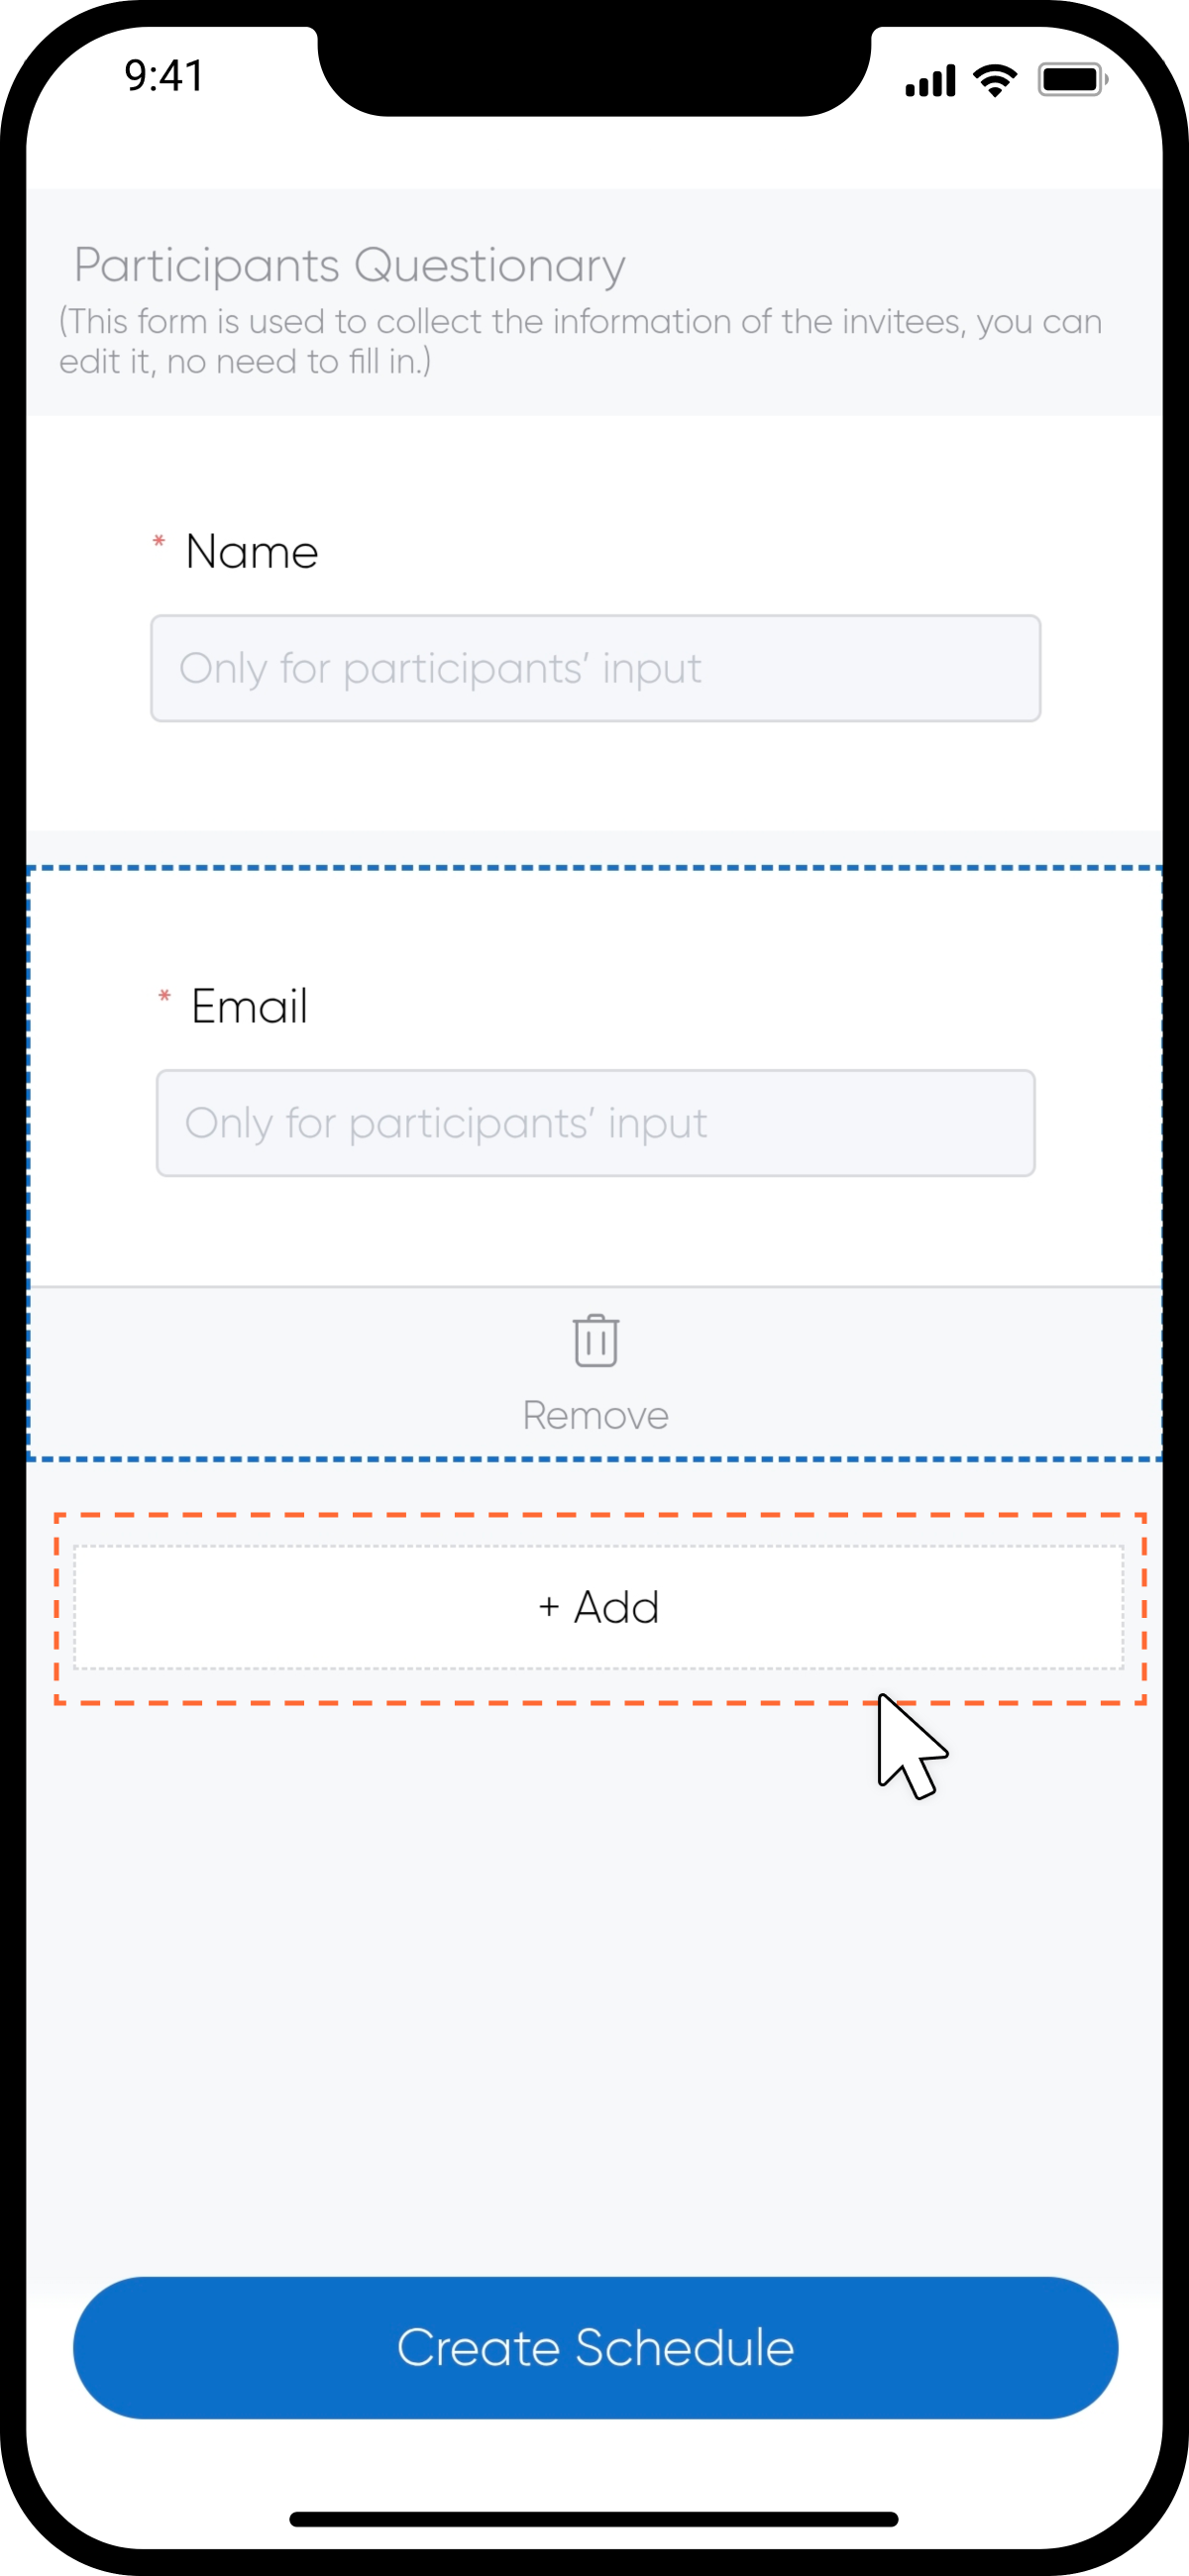
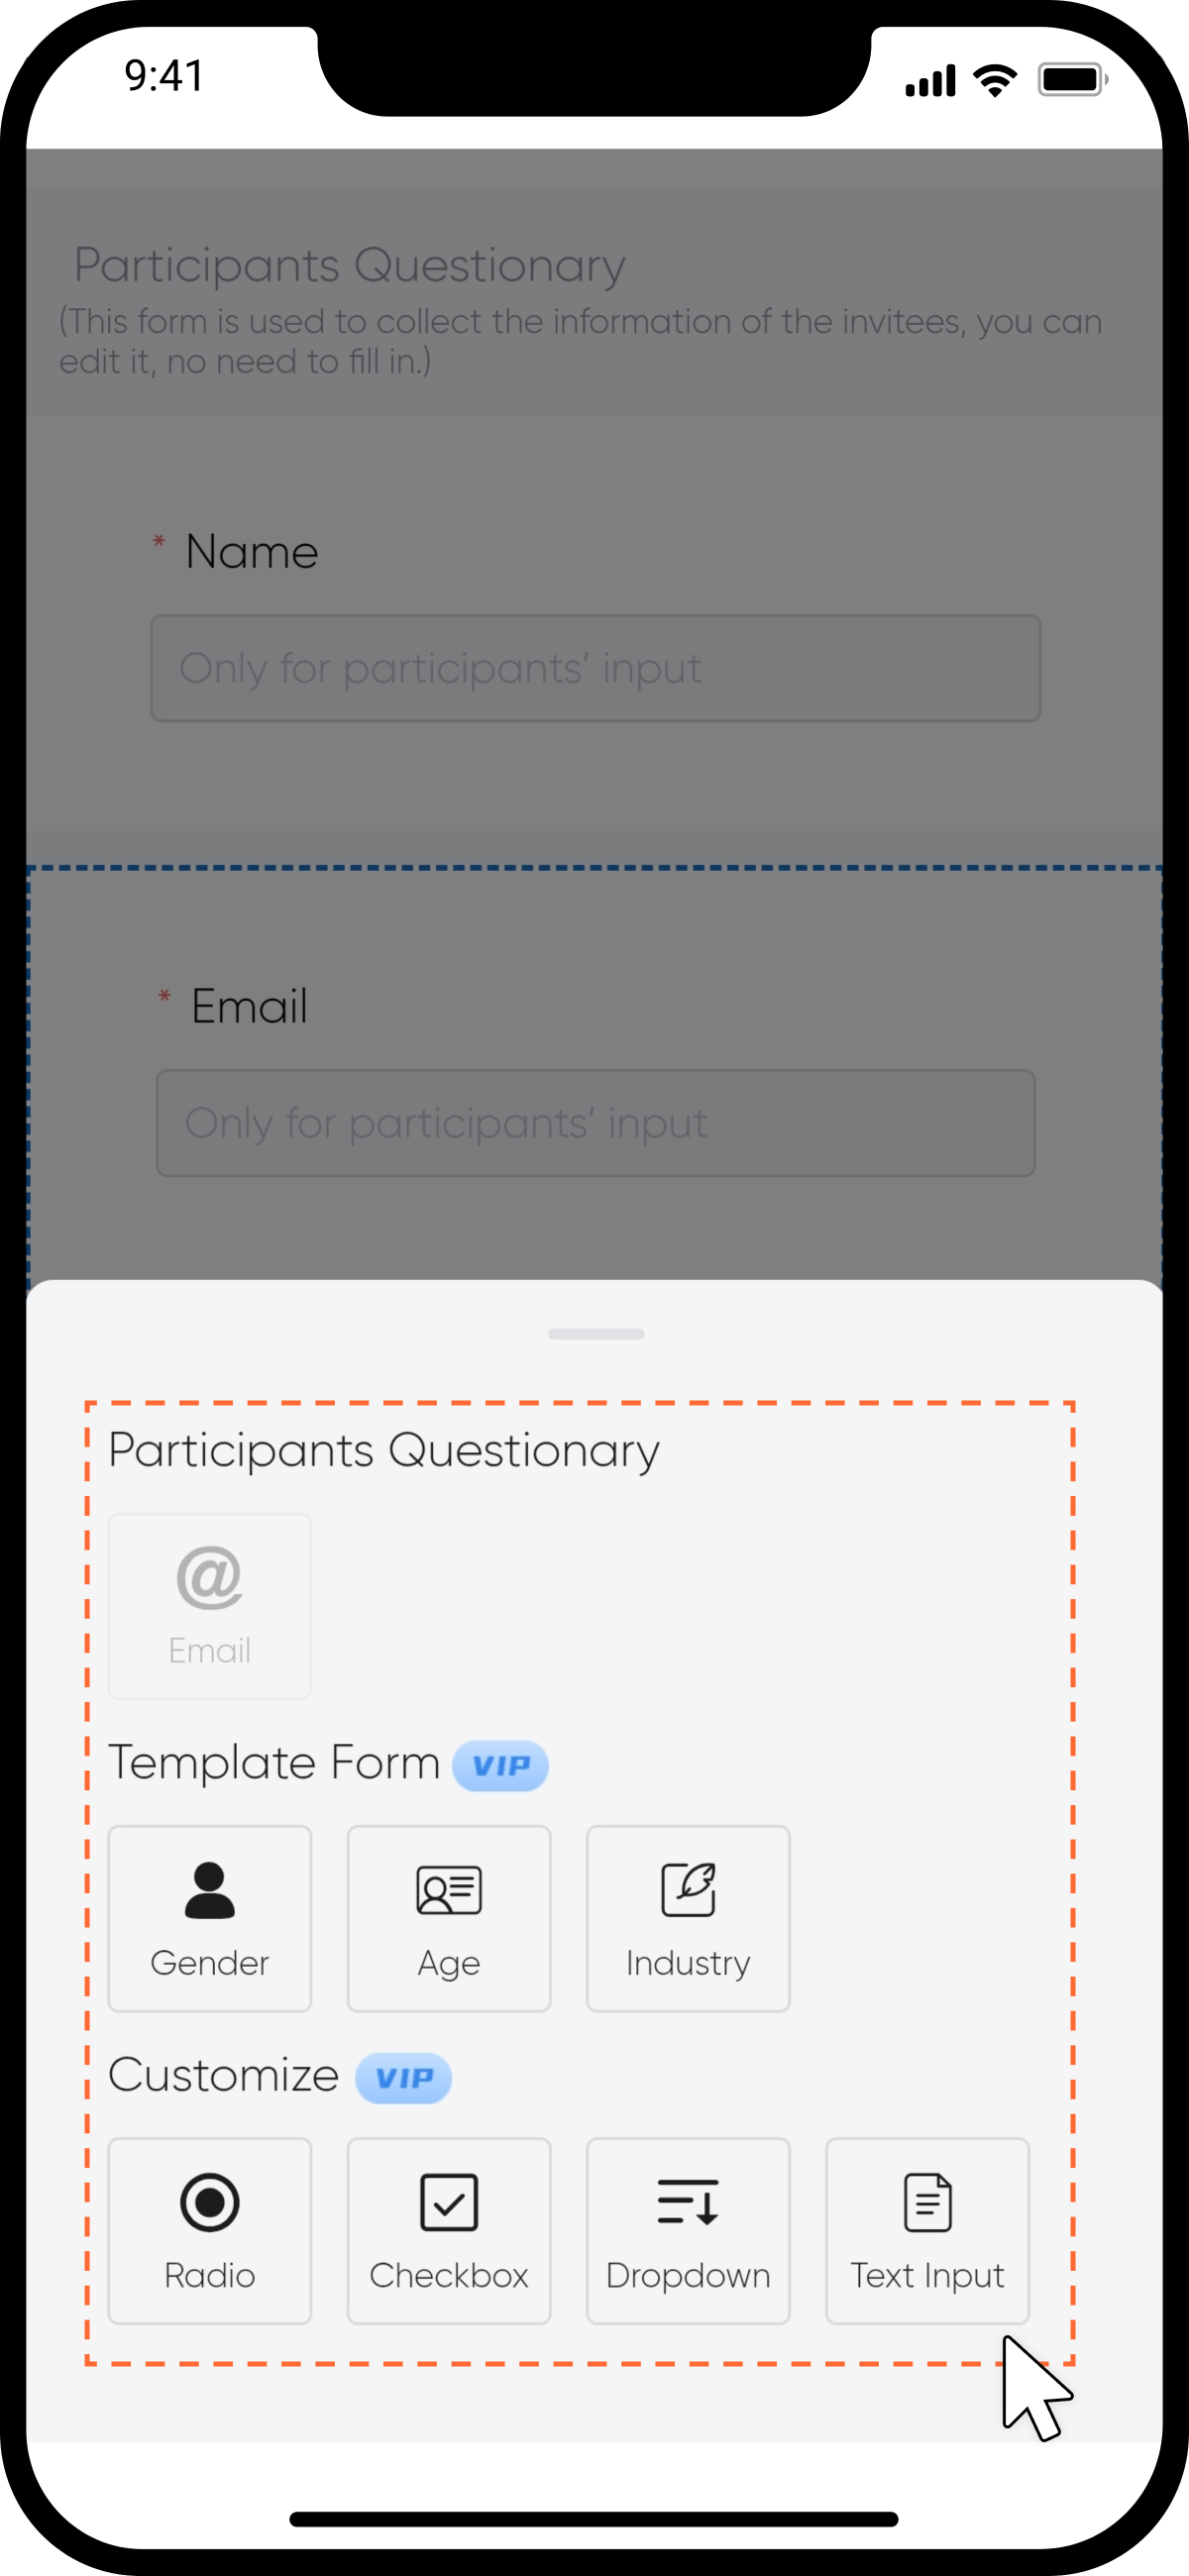
step7 Collect participant information
Customize a form to gather the information you need from participants.
step8
Once created, your schedule will appear in the schedule list. To share it, click the "Share" icon in the top-right corner of the schedule card. You can share via email, QR code, or link.。